Hello Friends! I am trying to help friends find a good home for "Shadow". He is a sweet, gentle house dog who is a great companion. Shadow is about 7 years old. His owner is very ill and is currently in the hospital but will be moved to a nursing home soon. The nursing home, of course, does not allow pets. My friends who are currently taking care of Shadow needs to find a home for him ASAP as the apartment complex that they live in does not allow pets either and they were told that if they continue to keep the dog there, they will be evicted. If he does not find a home soon, he will be taken to the Humane Society.
This is just too sad. Shadow is staying on and off in my yard in a little make shift house. He's okay when people are with him outside, but it's clear that he is not happy when he is left outside. He's not too happy about being outdoors because he is actually a house dog. My poor Mochiko would freak out if Shadow came into her house!
If you know of anyone who could give this sweet dog a home, please send me an email ASAP! I would truly hate to see this dog put down.
Thank you for reading my post tonight!
Wednesday, May 29, 2013
Tuesday, May 28, 2013
The New Stampin' Up! Catalog is here!!!
It's here!! The 2013 - 2014 Stampin' Up! catalog is now available! First day to order is Saturday, June 1. I'm loving all of the new products in this new catty! I went through it and tagged what caught my eye and the catalog is full of tags!!
Want a free catalog? Place a $30 order through my SU website http://alohagirl.stampinup.net and I will send a catalog to you! (Please note that this offer is my personal offer and not associated with any offer through Stampin' Up)
I am trying to plan an Open House sometime in early July. The catalog would already be available to order from, but I'm needing some time to figure out my free projects for this event. It's been a while since I've had an Open House. I will announce it here and on my facebook page.
Want a free catalog? Place a $30 order through my SU website http://alohagirl.stampinup.net and I will send a catalog to you! (Please note that this offer is my personal offer and not associated with any offer through Stampin' Up)
I am trying to plan an Open House sometime in early July. The catalog would already be available to order from, but I'm needing some time to figure out my free projects for this event. It's been a while since I've had an Open House. I will announce it here and on my facebook page.
Saturday, May 25, 2013
Money Headband for Graduation
Now that graduation is all done, I'm finally going to have time to do some posting! I know that not all of you are on Facebook and not seeing all of the projects that I've been working on, so I'm going to make a good effort to get back to blogging.
I am posting this sort of tutorial tonight because after I posted this on Instagram and FB, people are asking how to make one!
My son received this money headband from our neighbor "Aunty Lani" and I thought it was a really clever gift for the graduate!
You will need about 40 one dollar bills. If you can get your hands on some clean crisp bills, it kind of helps. Thanks to the gals at HSFCU for gathering their best of the dollars today. You guys are the best!
Step 1: take the dollar and fold it in half like this:
Step 2: Fold one edge to the center like this:
Step 3: Fold the other edge to the center to look like this:
Step 4: Fold the dollar in the center to look like this:
This is the side view after you fold it:
Step 5: Take the long ends and fold each edge to meet in the middle, it should look like this:
This is what it looks like when you are done.
Step 6: I folded about 10 dollars and then started to assemble the headband. Take two of the folded dollars and insert one into the other like this:
If done correctly, it should look like this:
Continue to add the folded dollars til done! Here's a couple of photos of the third dollar added.
That's it! To close the headband, save one dollar and skip Step 5. The dollar will be long.
Insert the dollar into the last dollar like this:
Other views of what it should look like (it was hard to take the photo with one hand and hold the headband!)
Another view...
To finish it up, tuck the ends into the dollar under the flaps. It's hard to explain, but you will know what to do when you are actually holding the headband. The photo below is not the actual size of the headband. I just closed it so I could take the photo and finish up this mini tutorial.
I would love to hear feedback from you! Hope you have fun making this headband and thank you for visiting my blog today!
I am posting this sort of tutorial tonight because after I posted this on Instagram and FB, people are asking how to make one!
My son received this money headband from our neighbor "Aunty Lani" and I thought it was a really clever gift for the graduate!
You will need about 40 one dollar bills. If you can get your hands on some clean crisp bills, it kind of helps. Thanks to the gals at HSFCU for gathering their best of the dollars today. You guys are the best!
Step 1: take the dollar and fold it in half like this:
Step 2: Fold one edge to the center like this:
Step 3: Fold the other edge to the center to look like this:
Step 4: Fold the dollar in the center to look like this:
This is the side view after you fold it:
Step 5: Take the long ends and fold each edge to meet in the middle, it should look like this:
This is what it looks like when you are done.
Step 6: I folded about 10 dollars and then started to assemble the headband. Take two of the folded dollars and insert one into the other like this:
If done correctly, it should look like this:
Continue to add the folded dollars til done! Here's a couple of photos of the third dollar added.
That's it! To close the headband, save one dollar and skip Step 5. The dollar will be long.
Insert the dollar into the last dollar like this:
Other views of what it should look like (it was hard to take the photo with one hand and hold the headband!)
Another view...
To finish it up, tuck the ends into the dollar under the flaps. It's hard to explain, but you will know what to do when you are actually holding the headband. The photo below is not the actual size of the headband. I just closed it so I could take the photo and finish up this mini tutorial.
I would love to hear feedback from you! Hope you have fun making this headband and thank you for visiting my blog today!
Wednesday, April 17, 2013
Things That Make Me Happy!
It's so nice to be re-connecting with you. Thank you to those of you who have already commented and sent me emails. I've missed all of you! If you want to subscribe to my new blog, type your email address in the box to the right of this post. I hope to be posting more crafty projects as time goes on. Right now, I'm trying to sort out my life and start getting my act together. I've been checking out ideas online and am trying to get a "feel" again for my projects and classes! Please tell me what kinds of projects you would like to do for a class! I'm kind of in a rusty mode right now so any suggestions would be welcomed!
Anyway, just wanted to post a few pics of what has been making me happy these days...
One of the happy things is getting my nails done. I've given up doing my own nails because I've decided that I cannot live without my acrylic overlay on my nails. It makes it stronger and doesn't get damaged with all of the dish washing and yard work that I do. My manicure lasts for at least 3 weeks to one month so I feel that it's worth it! I've been going to Stephanie's Nails in Kailua. Stephanie and Sam are really awesome! Here's a couple of pics of my nails done by Stephanie - I just love my Hello Kitty!
Here's another Hello Kitty...I don't get special designs all of the time, but when I do, they are so fun to look at every day.
Having a Starbucks is a special treat! This is the Passion Tea with extra Thai Walls (condensed milk)...soooo yummy!!
I've been browsing at My Girlfriend's Closet when I go to get my nails done. This is a used clothing store. Tenora (the owner) has some awesome taste in clothing and jewelry and I love that all of the clothing is washed before she puts them out! I found these fun pieces of jewelry on my last visit, don't you love them?!
Of course, I cannot forget my sweet fur baby - the Queen of the house. She brings me lots of joy! She's been hanging out in her favorite room - Dad's room. I know that she misses him just as much as I do!
Anyway, just wanted to post a few pics of what has been making me happy these days...
One of the happy things is getting my nails done. I've given up doing my own nails because I've decided that I cannot live without my acrylic overlay on my nails. It makes it stronger and doesn't get damaged with all of the dish washing and yard work that I do. My manicure lasts for at least 3 weeks to one month so I feel that it's worth it! I've been going to Stephanie's Nails in Kailua. Stephanie and Sam are really awesome! Here's a couple of pics of my nails done by Stephanie - I just love my Hello Kitty!
Here's another Hello Kitty...I don't get special designs all of the time, but when I do, they are so fun to look at every day.
Having a Starbucks is a special treat! This is the Passion Tea with extra Thai Walls (condensed milk)...soooo yummy!!
I've been browsing at My Girlfriend's Closet when I go to get my nails done. This is a used clothing store. Tenora (the owner) has some awesome taste in clothing and jewelry and I love that all of the clothing is washed before she puts them out! I found these fun pieces of jewelry on my last visit, don't you love them?!
Of course, I cannot forget my sweet fur baby - the Queen of the house. She brings me lots of joy! She's been hanging out in her favorite room - Dad's room. I know that she misses him just as much as I do!
Hey, thanks friends, for coming to visit me here on my new blog. If you are on Facebook or Instagram, look me up. I'm Nalogirl on IG if you would like to follow me. If I cannot recognize you by your IG name, send me an email so I know who you are. I know that some of you are not on the social networks, but I think it's the new way of communication and you can use it in the way that works for you. See you soon!
Sunday, April 14, 2013
Love You Forever Dad!
For those of you who have been my followers from my previous 2 blogs, you know that I took a break from blogging to take care of my Dad. I'm so sad to share that Dad passed away on March 29, 2013. He did not give up without a fight, but it was his time. Dad was 92 - just short of his 93rd birthday (May 10).
We had an awesome caregiver, Tobie, who eventually moved in to help me take care of Dad, I still had little time to do my crafting or much of anything else besides going to work. My monthly classes came to a standstill and I ran out of energy every night after all was said and done and Dad was in bed. It was all worth it though. I was blessed with so many wonderful memories of my Dad that I hold dear to my heart.
Just wanted to share a collage I made to remember my Dad. He was truly my hero, who taught me so much and molded me into the person I am today. I am so thankful. I love you Dad! I'm so happy that you are now in peace and that you are reunited with Mom. I can see both of you holding hands and catching up!
Thank you for reading my post and letting me dedicate a post to my Dad...I will be posting some of my Easter projects and hopefully more current projects!
We had an awesome caregiver, Tobie, who eventually moved in to help me take care of Dad, I still had little time to do my crafting or much of anything else besides going to work. My monthly classes came to a standstill and I ran out of energy every night after all was said and done and Dad was in bed. It was all worth it though. I was blessed with so many wonderful memories of my Dad that I hold dear to my heart.
Just wanted to share a collage I made to remember my Dad. He was truly my hero, who taught me so much and molded me into the person I am today. I am so thankful. I love you Dad! I'm so happy that you are now in peace and that you are reunited with Mom. I can see both of you holding hands and catching up!
Thank you for reading my post and letting me dedicate a post to my Dad...I will be posting some of my Easter projects and hopefully more current projects!
Holiday 2012 Class Projects!
This was a a giftcard holder that swings open
like this..
This is my fancy favor box with handles.
Tags...
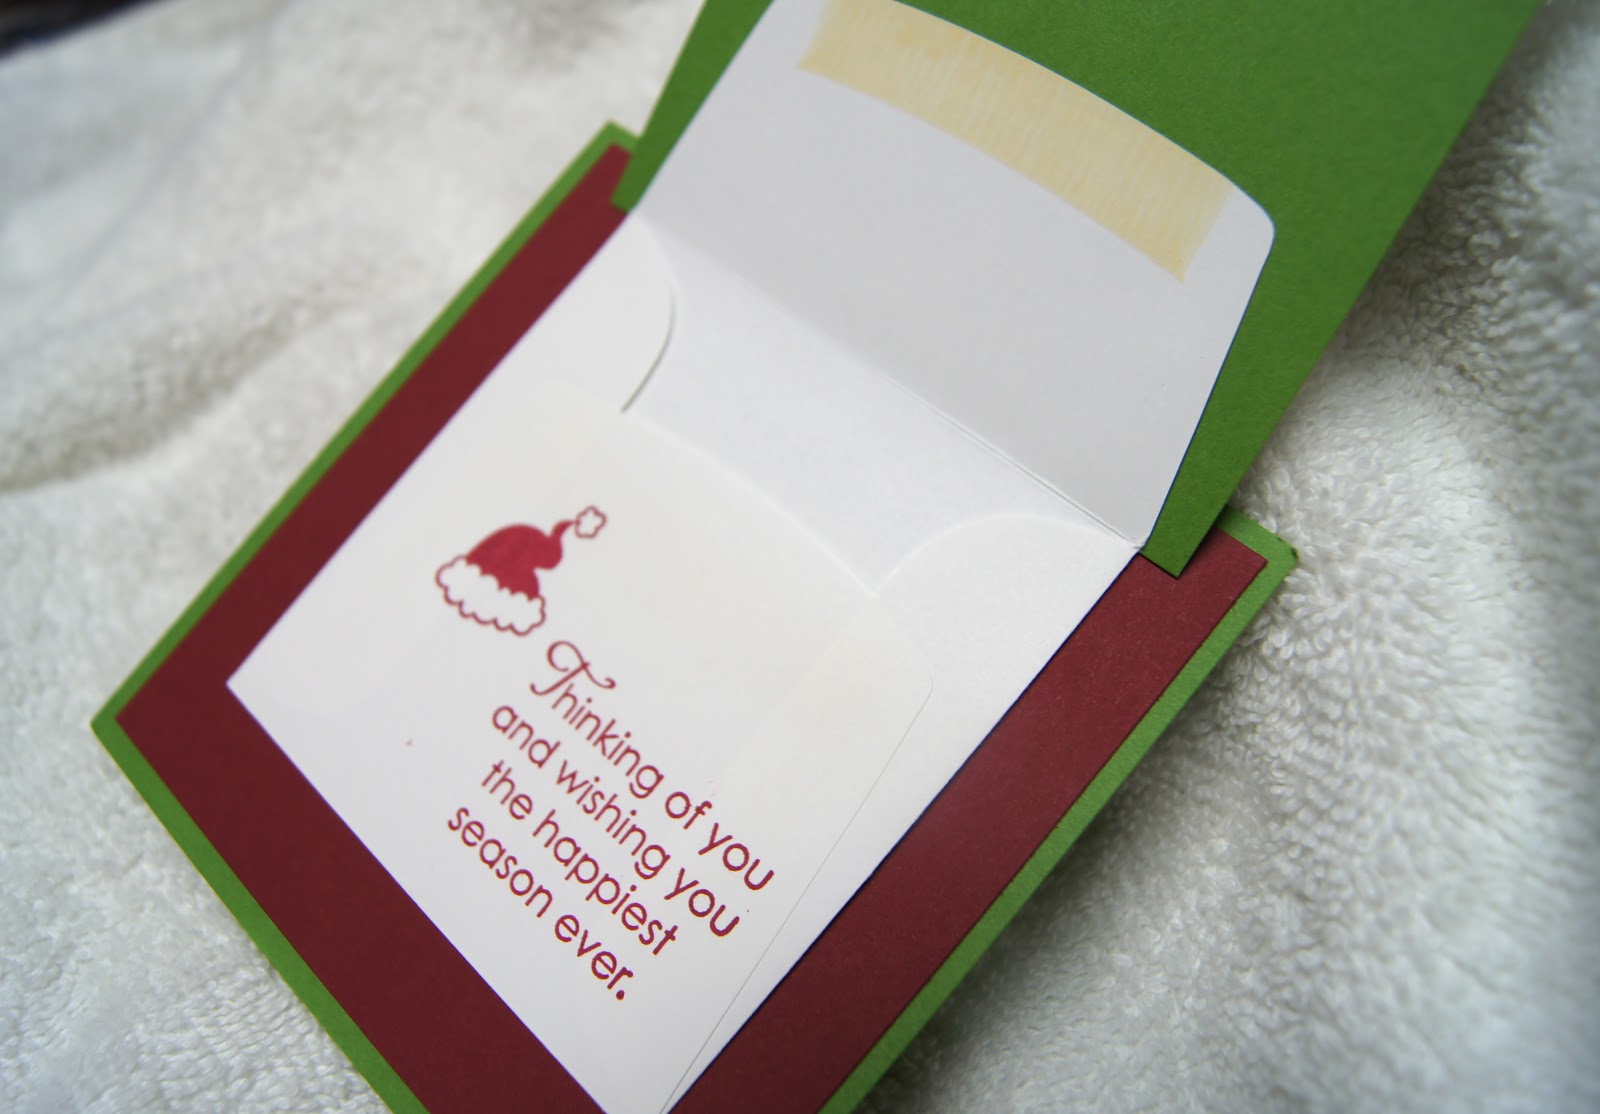
This card was made with a 3x3 envelope inside. You could put a little note card inside or maybe some $
Here is the inside
Another view
Another fun giftcard holder. This was the bonus project!
That's it for this post! I gotta get back into the swing of blogging!
Subscribe to:
Posts (Atom)


